
Introduction
If you’ve been eyeing the idea of leveraging the power of SQL Server but prefer the flexibility and efficiency of Linux, you’re in luck! Installing SQL Server on Linux has become remarkably straightforward, opening doors to a world where you can seamlessly integrate the reliability of SQL Server with the robustness of Linux operating systems. Whether you’re running Ubuntu, CentOS, or Red Hat, this guide will walk you through the steps to install SQL server on Linux and run it smoothly.
Install SQL Server on Ubuntu

Let’s start with Ubuntu, the most prevalent Linux distribution out there. Follow these steps, and you’ll have SQL Server installed in no time.
Step 1: Add Repository Key
Before delving into the installation process of SQL Server on Ubuntu, it’s imperative to fortify your system’s security by adding the repository key. This key acts as a digital signature, guaranteeing the authenticity and integrity of the packages you’re about to download. This step is crucial for safeguarding your system against any potential security threats.
In your terminal, execute the following command to seamlessly add the repository key to your system:
sudo wget -qO- https://packages.microsoft.com/keys/microsoft.asc | sudo apt-key add -
By incorporating this command into your terminal, you’re essentially establishing a secure channel through which your system can validate the authenticity of the SQL Server packages you’ll be installing. This ensures that you’re obtaining the software from a trusted and reliable source, mitigating any risks associated with tampered or malicious packages.
Additionally, by adding the repository key, you’re laying a robust foundation for an effective & hassle-free installation process. This active methodology intensifies the security posture of your system as well as streamlines the subsequent steps involved in installing SQL Server on Ubuntu.
Now, armed with the repository key, you’re ready to proceed to the next step of adding the SQL Server repository to your system.
Step 2: Add SQL Server Repository
Now that you’ve fortified your system with the repository key, it’s time to expand your package sources by adding the SQL Server repository. This repository serves as a centralized hub for accessing SQL Server packages tailored specifically for Linux environments. By incorporating this repository into your package sources, you gain access to a plethora of SQL Server-related tools and utilities designed to enhance your Linux experience.
To seamlessly integrate the SQL Server repository into your system, execute the following command in your terminal:
sudo add-apt-repository "$(wget -qO- https://packages.microsoft.com/config/ubuntu/$(lsb_release -rs)/mssql-server-2019.list)"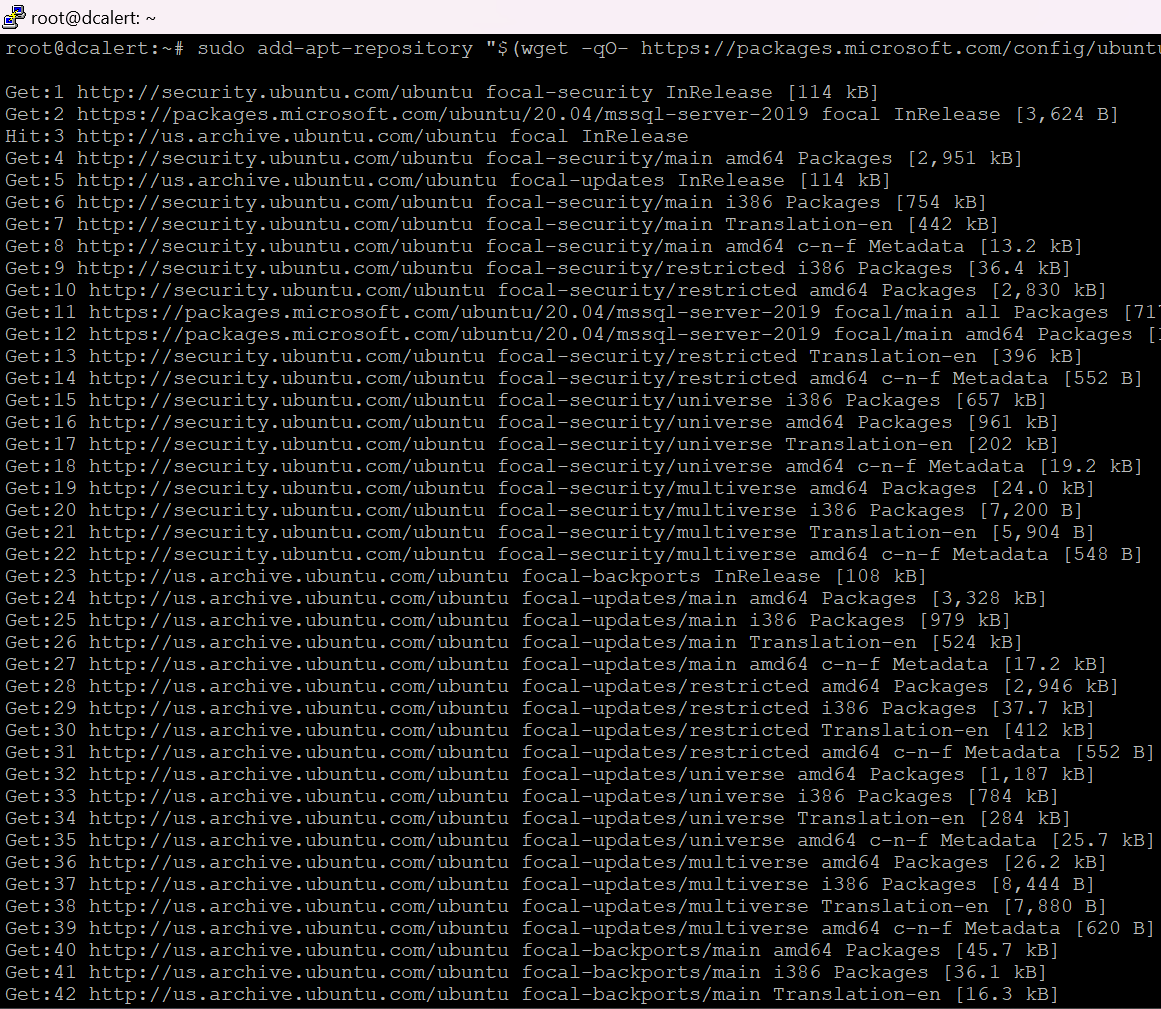
This command dynamically retrieves the appropriate repository configuration based on your Ubuntu version, ensuring compatibility and optimal performance. By leveraging this automated approach, you eliminate the guesswork associated with manually configuring repository sources, thereby streamlining the installation process.
With the SQL Server repository now added to your list of package sources, you gain access to a diverse array of SQL Server offerings tailored specifically for Linux distributions.
Step 3: Install SQL Server
Now that you’ve successfully added the SQL Server repository to your Ubuntu system, it’s time to take the next crucial step: installing SQL Server itself. This step marks the transition from preparation to implementation, as you prepare to bring the power and versatility of SQL Server to your Linux environment.
Execute the following commands in your terminal to initiate the installation process:
sudo apt-get update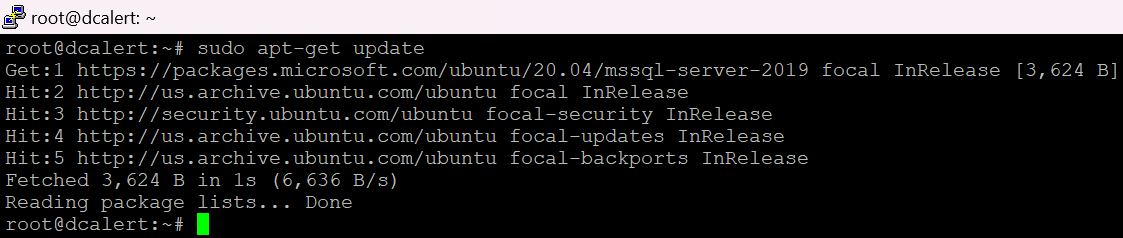
sudo apt-get install -y mssql-server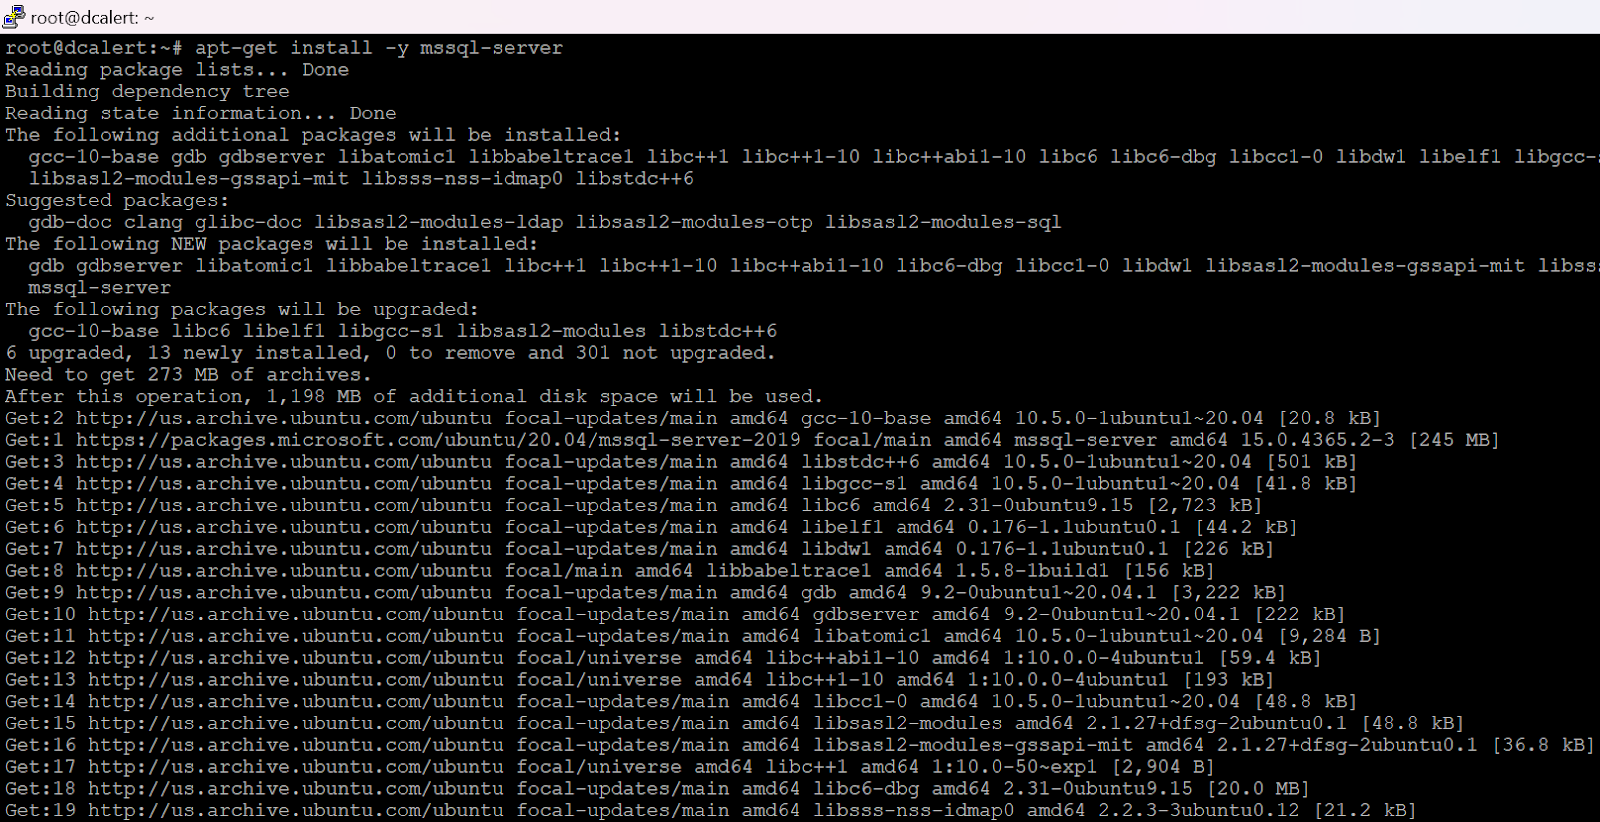
These commands serve as the gateway to seamlessly integrating SQL Server into your Ubuntu system. The first command, sudo apt-get update, ensures that your system’s package index is up to date, allowing you to access the latest versions of available packages. This proactive approach guarantees that you’re installing SQL Server using the most current and optimized resources.
Following the update, the second command, sudo apt-get install -y mssql-server, triggers the installation of SQL Server on your Ubuntu system. The -y flag automates the confirmation process, enabling a smooth and uninterrupted installation experience.
Step 4: Configure SQL Server
With the installation completed, it’s time to fine-tune your SQL Server configuration to ensure optimal performance and security. This crucial step lays the groundwork for seamlessly integrating SQL Server into your Linux environment, enabling you to unleash its full potential with confidence.
To initiate the configuration process, implement the given command in your terminal:
sudo /opt/mssql/bin/mssql-conf setup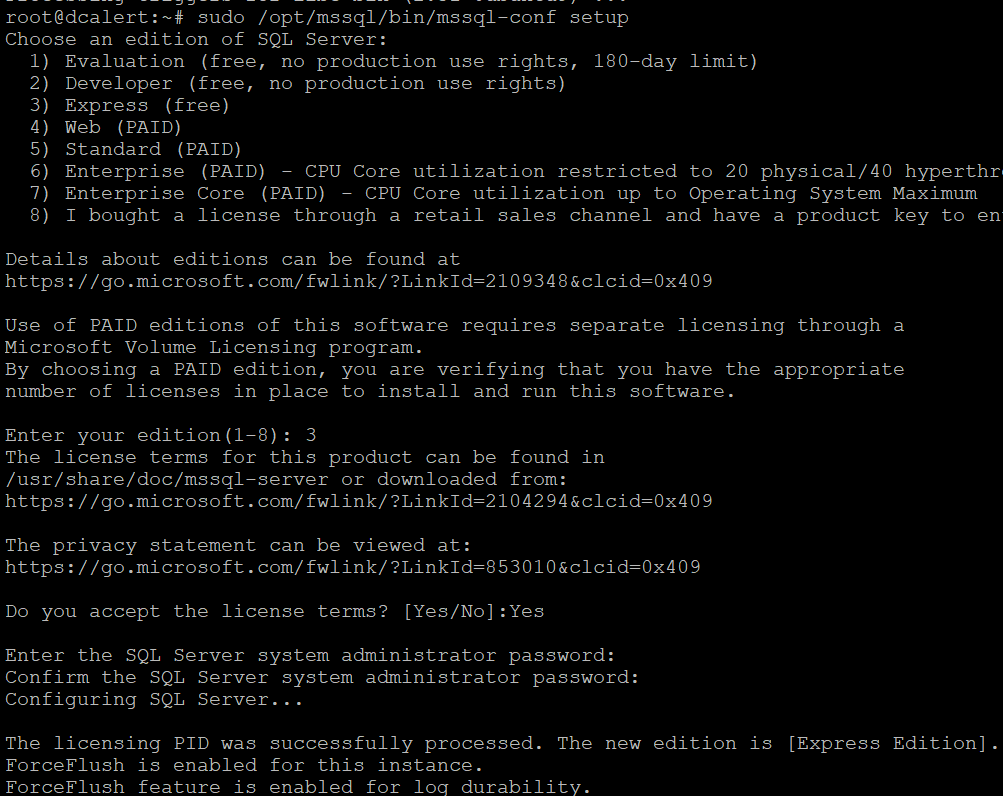
This command serves as your gateway to a personalized SQL Server experience, allowing you to tailor the configuration settings to align with your specific requirements and preferences. As you embark on this journey, you’ll be greeted with prompts guiding you through each aspect of the configuration process.
One of the primary tasks during configuration is setting the SA (System Administrator) password—a pivotal step in securing your SQL Server instance. The SA account grants unrestricted access to the database system, making it imperative to choose a strong and memorable password to safeguard against unauthorized access.
Additionally, you have the option to configure SQL Server to start automatically when the system boots, ensuring seamless operation without manual intervention. This automated startup mechanism enhances convenience and reliability, enabling SQL Server to seamlessly integrate into your Linux environment.
Install SQL Server on CentOS 7 and Red Hat (RHEL)

If you’re using CentOS 7 or Red Hat Enterprise Linux (RHEL), the process is slightly different but just as straightforward.
Step 1: Add SQL Server Repository
Just like in Ubuntu, adding the SQL Server repository to your CentOS 7 or RHEL system is a crucial first step towards installing SQL Server. By incorporating this repository into your system, you gain access to a wealth of SQL Server packages and resources tailored specifically for Linux environments.
Execute the following command in your terminal to seamlessly add the SQL Server repository:
sudo curl -o /etc/yum.repos.d/mssql-server.repo https://packages.microsoft.com/config/rhel/7/mssql-server-2019.repo
This command dynamically retrieves the repository configuration, ensuring compatibility with your CentOS 7 or RHEL system. By leveraging this automated approach, you eliminate the guesswork associated with manually configuring repository sources, streamlining the installation process.
With the SQL Server repository now integrated into your system, you’re poised to embark on the next phase of your journey towards harnessing the power of SQL Server on Linux.
Step 2: Install SQL Server
Now that you’ve added the SQL Server repository to your CentOS 7 or RHEL system, it’s time to proceed with the installation process. SQL Server is just a command away from being installed and ready for configuration on your Linux system.
Execute the following command in your terminal to initiate the installation of SQL Server:
sudo yum install -y mssql-serverThis command triggers the installation process, pulling the necessary SQL Server packages from the newly added repository. The -y flag automates the confirmation process, ensuring an efficient as well as uninterrupted installation experience.
As the installation progresses, take a moment to appreciate the importance of this milestone. You’re not just installing SQL Server; you’re integrating a powerful relational database management system seamlessly into your CentOS or RHEL environment, unlocking a world of possibilities for data storage, retrieval, and analysis.
Step 3: Configure SQL Server
With SQL Server successfully installed on your CentOS 7 or RHEL system, it’s time to configure it to suit your specific requirements. Configuration is a critical step in the installation process, as it enables you to customize SQL Server settings, set administrative passwords, and optimize performance.
Initiate the configuration process by implementing the given command in your terminal:
sudo /opt/mssql/bin/mssql-conf setupThis command launches the configuration wizard, guiding you through the process of setting up SQL Server according to your preferences. One of the key tasks during configuration is setting the SA (System Administrator) password, which grants unrestricted access to the database system.
Step 4: Install SQL Server Command Line
Interacting with SQL Server from the command line is a fundamental aspect of database administration and development. To streamline your workflow and enhance productivity, it’s essential to install the SQL Server command-line tools on your CentOS 7 or RHEL system.
Execute the following commands in your terminal to install the necessary packages:
sudo yum install -y mssql-tools unixODBC-develThese commands fetch and install the SQL Server command-line tools and the UnixODBC development package, equipping you with the necessary utilities for seamless interaction with SQL Server from the command line.
By installing the SQL Server command-line tools, you empower yourself with a versatile toolkit for database management, query execution, and system administration tasks.
With the installation of SQL Server command-line tools complete, you’re now fully equipped to harness the power of SQL Server on Linux, leveraging its capabilities to drive innovation and success in your projects and initiatives.
Also Read: How to Install Ubuntu on Hyper-V?
Conclusion
That’s all! You’ve successfully installed SQL Server on Linux, whether it’s Ubuntu, CentOS, or Red Hat. By executing these straightforward steps, you have opened up the potential to harness the power of SQL Server within the familiar environment of Linux. It does not matter if you are a developer, system administrator, or database enthusiast, this installation opens doors to a world of possibilities. Start exploring, experimenting, and leveraging the seamless integration of SQL Server on Linux today!


