


Introduction
If you’re ready to dive into the world of Rust programming on your Ubuntu system, you have come to the apt site. In this guide, you’ll learn two reliable methods to install Rust on Ubuntu – one using the apt package manager and the other employing rustup. Whether you’re a seasoned developer looking to explore a new language or a beginner eager to dive into programming, these steps will swiftly have you up and running with Rust on your Ubuntu machine.
Rust has acquired huge popularity for its emphasis on protection, functioning, and consistency. By installing Rust on your Ubuntu system, you open the door to a vibrant ecosystem of tools and libraries, empowering you to build robust and efficient software solutions.
Option 1: Install Rust on Ubuntu Using apt

Step 1: Update the Package Registry
First things first – ensure your package registry is up-to-date. Open your terminal and type:
sudo apt update
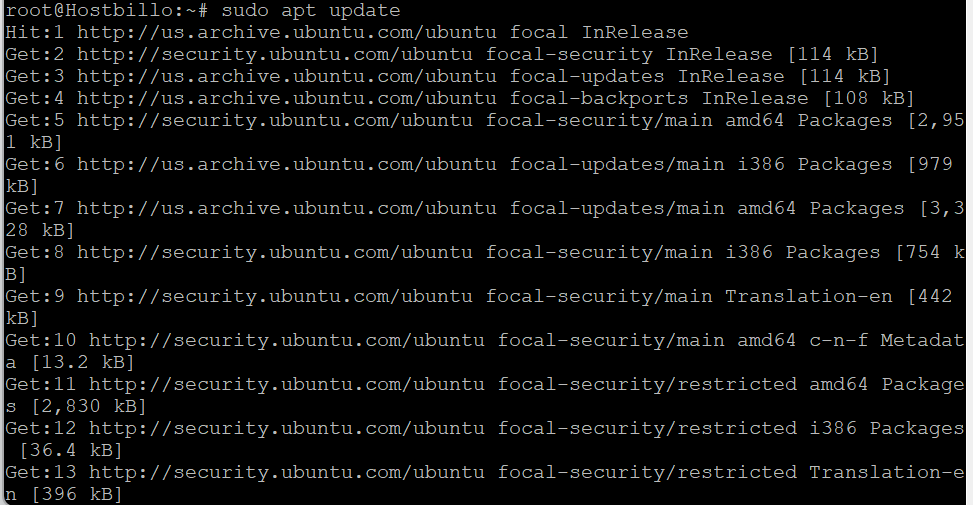
This command assures you have the latest details on accessible packages for installation. It’s essential to keep your package registry updated to ensure smooth installation and compatibility with other software on your system. By running apt update, you’re essentially syncing your local package index with the latest changes made to the repositories.
Step 2: Install Rust
Now that your package registry is fresh, let’s proceed with installing Rust:
sudo apt install rustc
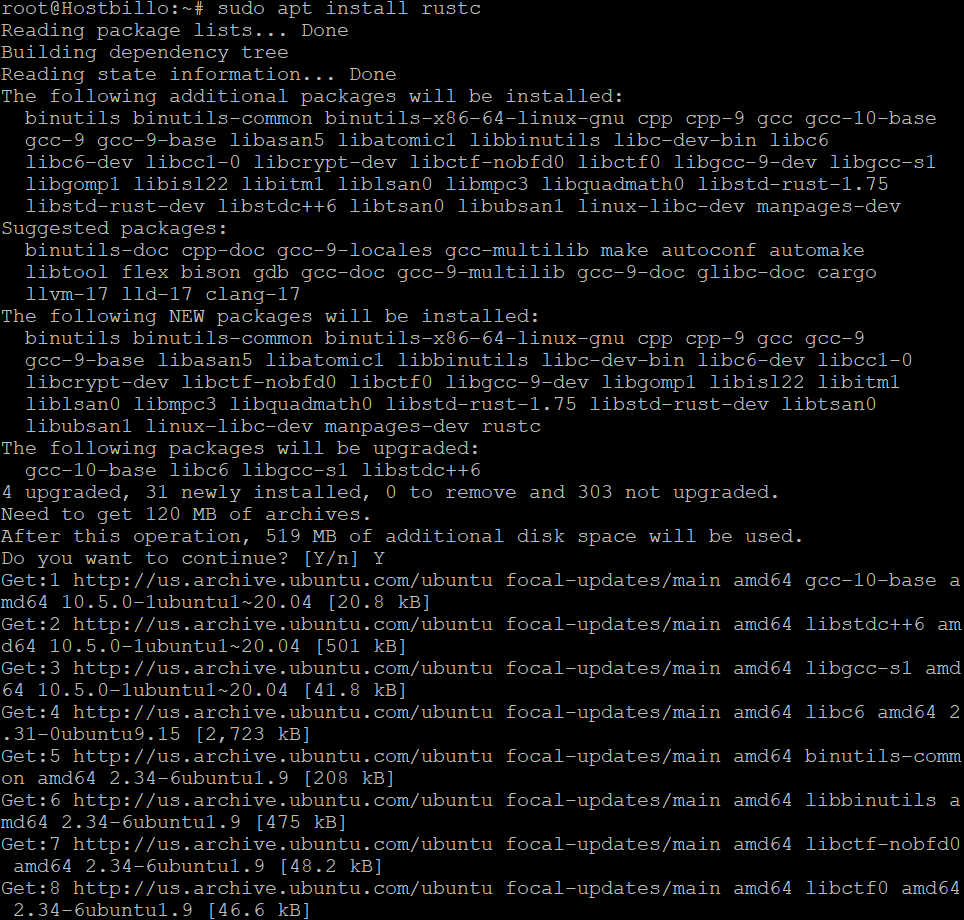
This command triggers the installation of the Rust compiler (rustc) along with other essential tools needed for Rust development. apt install rustc fetches the necessary packages from the Ubuntu repositories and sets up Rust on your system. It’s a straightforward process, and once completed, you’re ready to start coding in Rust.
Step 3: Verify the Installation
As soon as the installation is done, it is critical to confirm that Rust is properly installed on your system. You can do this by typing:
rustc --version

Executing rustc –version in your terminal will display the version number of Rust installed on your Ubuntu system. This verification step ensures that the installation process went smoothly and that you can start using Rust without any issues. If Rust is installed correctly, you’ll see its version number printed in the terminal, indicating that you’re all set to dive into Rust programming.
Option 2: How to Install Rust on Ubuntu Using rustup

Step 1: Download rustup
Start by downloading rustup, the Rust toolchain installer. You can do this by running the following command:
curl --proto '=https' --tlsv1.2 -sSf https://sh.rustup.rs | sh
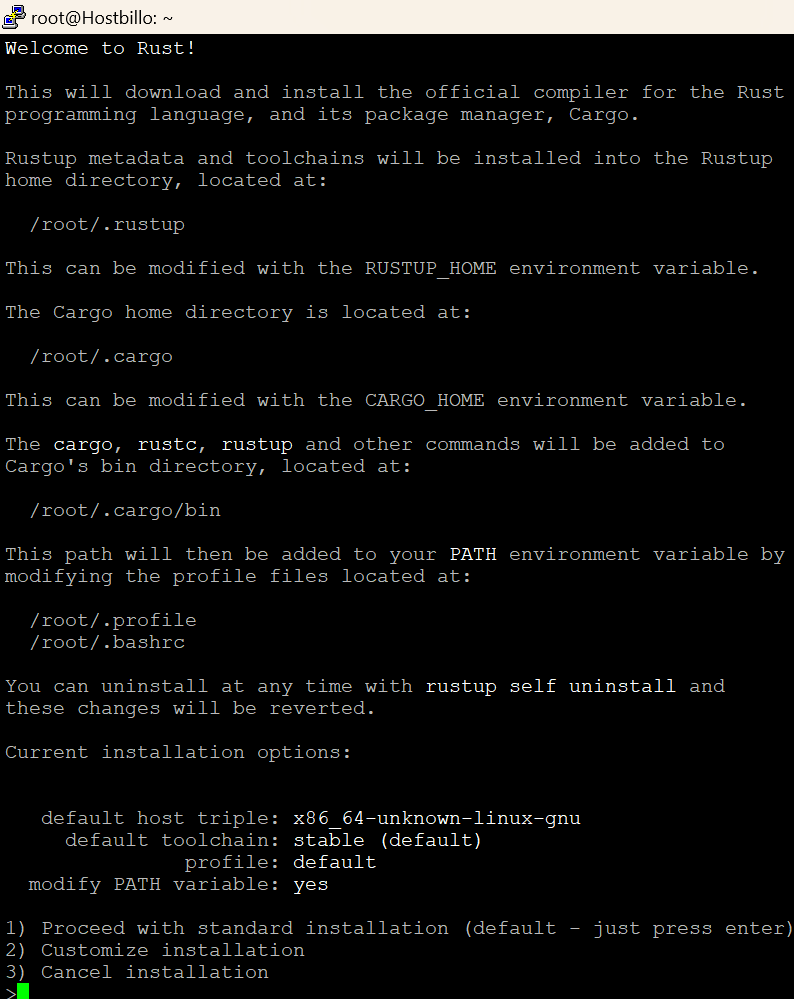
This command fetches the latest version of rustup directly from the official Rust website and initiates the installation process. Rustup is the recommended way to install Rust as it allows for greater flexibility in managing different versions of Rust and associated tools. By using rustup, you assure that you possess accessibility to the latest features & updates in the Rust ecosystem.
Step 2: Add Rust to PATH
After rustup is installed, you need to add Rust to your system’s PATH variable. This step is crucial as it allows you to run Rust commands from any directory without specifying the full path to the Rust executable. To achieve this, simply type:
source $HOME/.cargo/envExecuting this command configures your current shell session to recognize Rust, enabling you to access Rust tools and commands seamlessly. This step simplifies your workflow and makes it easier to develop Rust projects on your Ubuntu system.
Step 3: Verify the Installation
With Rust now in your PATH, it’s time to verify the installation:
rustc --version

Executing rustc –version in your terminal should display the installed version of Rust. This confirmation verifies that rustup was aptly installed & configured on your Ubuntu system. In addition to this, it guarantees that you can begin employing Rust promptly without any additional setup. If the installed version of Rust is shown, you are all ready to discover the abilities of Rust programming language on your Ubuntu system.
How to Uninstall Rust on Ubuntu

Uninstalling Rust from your Ubuntu system is a straightforward process that ensures you can manage your development environment efficiently. It does not matter if you are emptying up space or transferring to a diverse programming language, it’s essential to know how to cleanly remove Rust.
If you installed Rust via apt, you can use the following command to remove it:
sudo apt remove rustc
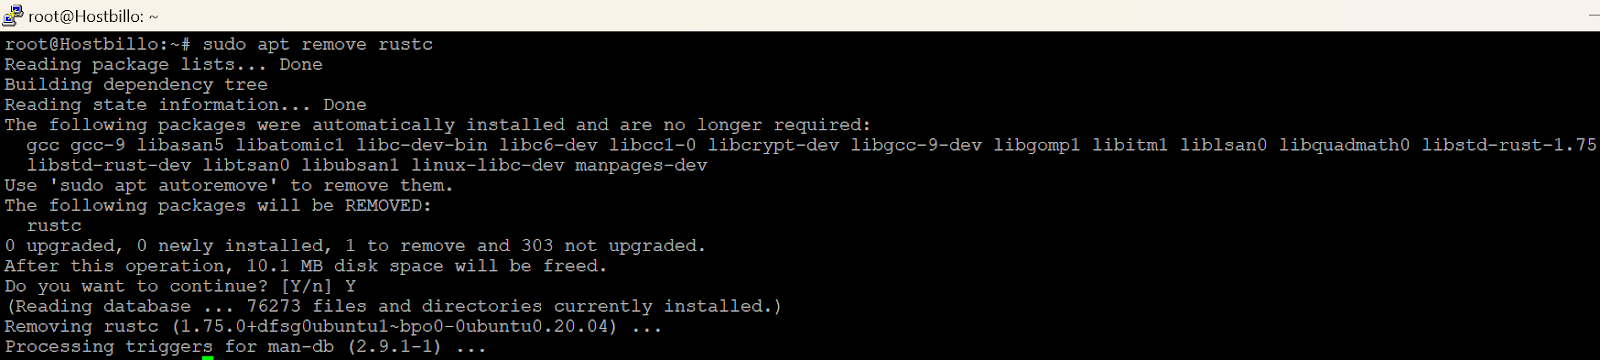
Executing this command effectively removes the Rust compiler (rustc) and related packages installed through apt. This command acts swiftly, removing all traces of Rust installed via apt, and ensuring that your system reverts to its previous state without any remnants of Rust.
Similarly, if you opted for rustup for installation, executing the following command will uninstall Rust:
rustup self uninstallThis command not only removes rustup but also eliminates all Rust toolchains installed through rustup. By running this command, you ensure a thorough cleanup, reclaiming disk space and ensuring that there are no lingering components of Rust on your Ubuntu system.
Uninstallation may be necessary for various reasons, such as troubleshooting, system maintenance, or transitioning to different development tools. Whatever the reason, knowing how to uninstall Rust gives you control over your development environment and keeps your system organized and efficient.
By following these simple steps and executing the appropriate commands, you can seamlessly uninstall Rust from your Ubuntu system, allowing you to manage your programming environment effectively. Whether you installed Rust via apt or rustup, the uninstallation process ensures a clean removal, leaving your system ready for whatever comes next in your development journey.
Also Read: How to Update Node js Version on Windows, Ubuntu, and Mac?
Conclusion
Congratulations! By following the steps outlined in this guide, you’ve successfully installed Rust on your Ubuntu system using either the apt package manager or rustup. Whether you opted for the convenience of apt or the flexibility of rustup, you’ve taken a significant step forward in your journey into Rust programming.
Rust is a programming language as well as a tool for building reliable and effective software solutions. With its emphasis on security, concurrency, and operations. Rust empowers developers to tackle complex problems with confidence. By installing Rust on your Ubuntu system, you’ve gained access to a vast ecosystem of libraries, frameworks, and tools that will support you in your coding endeavors.
It does not matter if you are an expert developer seeking to enhance your skillset or a novice eager to discover new horizons, Rust offers something for everyone. Its clear syntax, strong type system, and powerful features make it a joy to work with, enabling you to write code that is both elegant and efficient. As you continue your journey with Rust, don’t hesitate to explore its vast ecosystem and community resources. From documentation and tutorials to forums and meetups, there are plenty of resources available to help you grow as a Rust programmer.
Continue coding, keep up with your learning, and most significantly, have fun on the journey ahead! Rust programming opens up a world of possibilities, and we’re excited to see where it takes you next.