
Preface
Before delving into the intricacies of installing Helm on various operating systems, let’s take a moment to understand what Helm is and why it’s such a valuable tool for Kubernetes users.
Kubernetes, the container orchestration platform, has gained immense popularity for its ability to automate the scaling, deployment & administration of containerized applications. However, as the complexity of Kubernetes deployments grows, handling applications & their dependencies becomes even more complicated. Think of Helm as the package manager for Kubernetes. Just as package managers simplify the installation and management of software on your computer, Helm streamlines the deployment & handling of applications on Kubernetes clusters.
With Helm, you can package your Kubernetes applications into reusable, version-controlled charts. These charts contain all the necessary Kubernetes manifest files, configuration settings, and dependencies needed to deploy your application. This abstraction makes it incredibly easy to share, distribute, and install applications on any Kubernetes cluster, regardless of its complexity.
Need to deploy a popular application like Prometheus or Elasticsearch? There’s probably a Helm chart for that, ready to be installed with an individual command. But Helm isn’t just for deploying off-the-shelf applications. It is also a robust element for administering your custom applications. With Helm’s templating engine, you can dynamically generate Kubernetes manifests, customize configurations, and parameterize values based on your environment or requirements. In addition to simplifying deployment and enhancing collaboration, Helm also offers robust versioning and release management capabilities. Need to move back to the last application’s version? With Helm, it’s as simple as running a command.
Define Helm
Helm is a powerful package manager for Kubernetes, revolutionizing the way applications are deployed and managed in Kubernetes environments. Here’s a closer look at some of its key features:
Package Management:
Helm simplifies the packaging and distribution of Kubernetes applications through charts, which encapsulate all the necessary resources and configurations into a single, shareable unit.
Dependency Management:
Helm allows you to define dependencies between different components of your application, ensuring that all required resources are installed and configured correctly during deployment.
Template Rendering:
Helm’s templating engine enables the dynamic generation of Kubernetes manifest files, allowing you to customize configurations based on environment variables, user inputs, or predefined values.
Release Management:
Helm provides versioning and release management capabilities, enabling you to track changes to your application deployments and easily roll back to previous versions if needed.
Community Ecosystem:
Helm boasts a vibrant ecosystem of charts and repositories, where users can discover, share, and collaborate on pre-built charts for popular applications and services.
With Helm, you can streamline your Kubernetes workflows, accelerate application deployment, and unlock new possibilities for managing complex distributed systems. Now, let’s proceed to the installation guides for Ubuntu, Mac, and Windows to get you started with Helm.
How to Install Helm?
Installing Helm on Ubuntu
If you’re using Ubuntu and want to harness the capabilities of Helm, you’re in luck. Installing Helm on Ubuntu is a smooth method. Follow these steps:
Update your package index: Before installing any new software, it is always a sensible idea to update your package index to ensure you are obtaining the latest versions. Open a terminal window and run the following command:
sudo apt-get update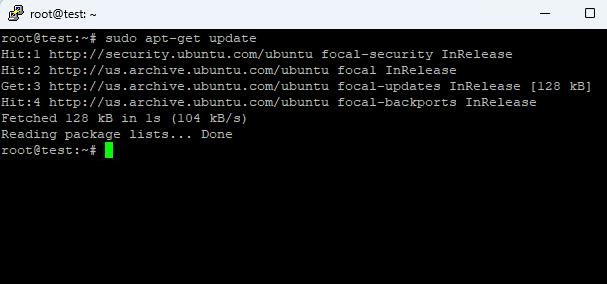
Install Helm: Once your package index is up to date, you can install Helm using the apt package manager. Run the following command:
sudo apt-get install helm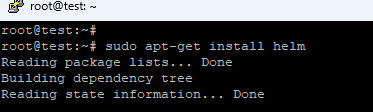
Verify the installation: As soon as the installation is finished, you can check that Helm is installed correctly by running the following command:
helm versionCongratulations! You’ve successfully installed Helm on your Ubuntu machine. Now you can start using Helm to handle your Kubernetes applications without any hassle.

Installing Helm on Mac
For Mac users, installing Helm is also a breeze. Here’s how you can do it:
Install Homebrew: Homebrew is a package manager for macOS that makes it simple to install and handle software packages. If you haven’t already installed Homebrew, you can do so by running the following command in your terminal:
/bin/bash -c "$(curl -fsSL https://raw.githubusercontent.com/Homebrew/install/HEAD/install.sh)"Install Helm: Once Homebrew is installed, you can use it to install Helm by running the following command:
brew install helmVerify the installation: Once the installation is finished, you can check that Helm is installed aptly by running the given command:
helm versionThat’s it! You now have Helm installed on your Mac, ready to help you manage your Kubernetes applications effortlessly.
Installing Helm on Windows
If you are a Windows user, you might be thinking about how to get started with Helm. Don’t worry, it’s just as simple as on other platforms. Here’s what you need to do:
Download the Helm installer: Head over to the Helm GitHub releases page and download the latest Windows installer (helm-windows-amd64.zip). Once downloaded, extract zip file contents to a folder of your preference.
Add the Helm executable to your PATH: Next, you are required to add the directory consisting of the Helm implementable to the PATH environment variable of your system. This will allow you to run Helm commands from any terminal window.
Confirm the installation: Open up a new window of a terminal and run the following command to verify that Helm has been installed correctly:
helm version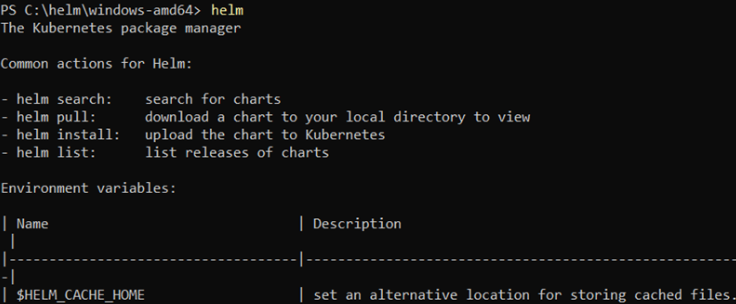
You’re all set! Now you can use Helm to manage your Kubernetes applications on your Windows machine without any hassle.
Also Read: How to Install RPM Packages On Ubuntu
Final Words
Congratulations on taking the first step towards enhancing your Kubernetes workflows by learning how to install Helm. By installing Helm on your preferred operating system—whether it’s Ubuntu, Windows, or Mac—you are equipping yourself with a resilient element that will modify the way you administer Kubernetes applications. With Helm, you’ll no longer need to wrestle with complex Kubernetes manifests or struggle to coordinate dependencies. Instead, you’ll be able to package your applications into reusable charts, share them with your team or the broader community, and deploy them with confidence.
But installing Helm is just the beginning. As you dive deeper into Helm’s features and capabilities, you’ll discover new ways to optimize your Kubernetes workflows, automate repetitive tasks, and scale your applications with ease. Whether you’re a seasoned Kubernetes pro or just getting started with container orchestration, Helm has something to offer for everyone. So go ahead, download Helm, install it on your system, and start exploring the possibilities. And remember, if you ever need assistance or run into any challenges along the way, the vibrant Helm community is here to support you.
Happy charting!


