
Introduction
Docker containers are known to manage software and applications. This utility packs everything an application needs into a lightweight box. Just like a container manages applications, a portainer manages docker containers.
This article will take you on an informative ride to understand portainers. We urge you to board this train to learn how to install Docker Portainer on Linux without making any mistakes.
What is Docker Portainer?
So, where were we? Yes, we were talking about how containers manage applications and partners manage the container. Now you might ask about whether a docker container can work without a portainer. Well, it is not mandatory to combine a container and portainer, but it does make a positive impact on the management of docker containers. A docker environment can be tricky sometimes, especially if you are dealing with them in multiple numbers. When you install a docker portainer on your system, you will see a friendly user interface. Yes, you won’t have to deal with the dull command-line tool to manage your dockers. Now, let’s learn the steps to install a docker portainer.
Also Read: How to Install Docker on Ubuntu 22.04?
Steps to Install Docker Portainer on Linux

Docker Portainer is a powerful management tool that simplifies the orchestration of Docker containers, offering users a user-friendly interface to streamline container deployment, monitoring, and collaboration. We have listed steps to install the portainer for docker management below. Do give it a thorough read to avoid any mistakes in acting.
Step 1: Create Docker Volume
- A docker volume is used to store and share important data between different dockers. A docker volume ensures that the data related to the portainer stays for a longer time. Use the following command to create a docker volume:
docker volume create portainer_data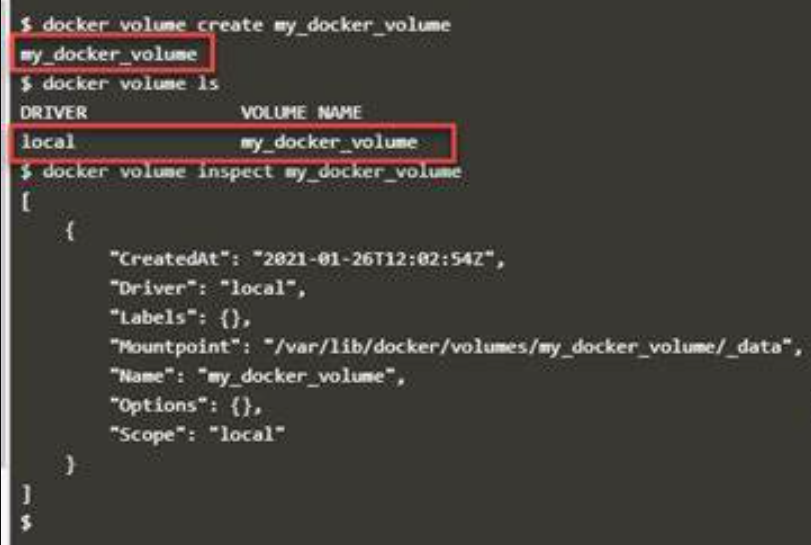
Step 2: Install Portainer Server
- The next step is to deploy the portainer container using the below command.
docker run -d -p 9000:9000 --name=portainer --restart=always -v /var/run/docker.sock:/var/run/docker.sock -v portainer_data:/data portainer/portainer
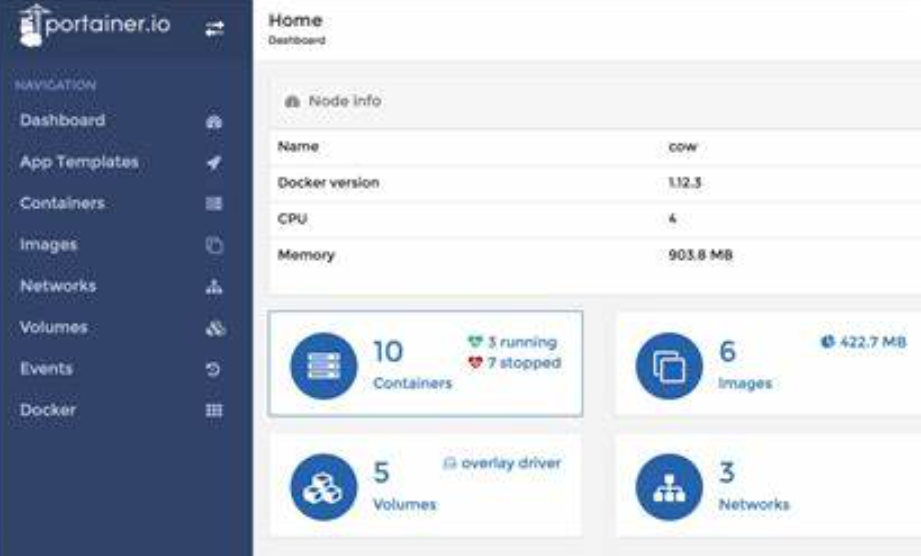
Step 3: Access Portainer Dashboard
- Now that the installation is complete, you need to access the portainer dashboard. Simply open the web browser and enter “http://localhost:9000.”
- The system will now ask you to create an ID and password.
Step 4: Follow the on-screen instructions
- Setting up an admin user in Portainer involves creating a user with special privileges, akin to being the boss of Portainer. This admin user has the authority to manage users, create and delete containers, and adjust Portainer’s settings. During setup, you’ll be prompted to choose a password for this admin user, enhancing the security of your Portainer installation and preventing unauthorized access. Following the on-screen instructions provided when accessing Portainer through a web browser, you’ll input the chosen username and password for the admin user. It’s important to select a strong password to safeguard your Portainer instance, especially if it’s accessible from the internet. Remembering these credentials is essential as they’ll be used for future logins, ensuring continued access to Portainer’s management capabilities.
Step 5 (Optional): Add More Environments to Portainer Installation
- If you have multiple Docker environments (e.g., local Docker daemon, Docker Swarm clusters, remote Docker hosts), you can add them to Portainer for centralized management.
- Navigate to the “Endpoints” section in the Portainer dashboard and click “Add Endpoint” to add additional Docker environments.
Step 6: Deploy Container Using Portainer
- Once Portainer is set up, you can use it to deploy and manage containers.
- Navigate to the “Containers” section in the Portainer dashboard and click “Add Container” to deploy a new container.
- Fill in the container details, such as image name, container name, ports, volumes, etc., and click “Deploy the container” to launch the container.
Final Words
Docker Portainer simplifies the management of Docker containers by providing a user-friendly interface that eliminates the need for complex command-line interactions. By following the steps outlined in this guide, you can easily install and set up Portainer on your Linux system. Creating a Docker volume ensures that important data related to Portainer remains persistent while deploying the Portainer server enables access to its dashboard through a web browser.
By creating Docker volumes and deploying the Portainer server, users can ensure persistent storage of important data and gain access to the Portainer dashboard through a web browser. Setting up an admin user with strong credentials enhances security and grants special privileges for managing containers and adjusting Portainer settings. With support for multi-user access and role-based permissions, Portainer facilitates collaboration and centralized management of Docker environments across various deployment scenarios.
Setting up an admin user with a strong password enhances security and grants special privileges for managing containers and adjusting Portainer settings. Additionally, the option to add multiple Docker environments allows for centralized management, while deploying containers using Portainer streamlines the container deployment process. Furthermore, Portainer’s integration with the Docker ecosystem and vibrant community support ensure ongoing improvement and scalability for users seeking to optimize their Docker workflows and maximize efficiency.


